 Regular
  Pocket Card
  Sentiment
  Scene
Scene  Icon
Icon  Pop-up
  Sleeve
Each key has these many options, making this cartridge house over 700 images! Want to see all the Artfully Sent images? Check it out.
Here is the first card I made:
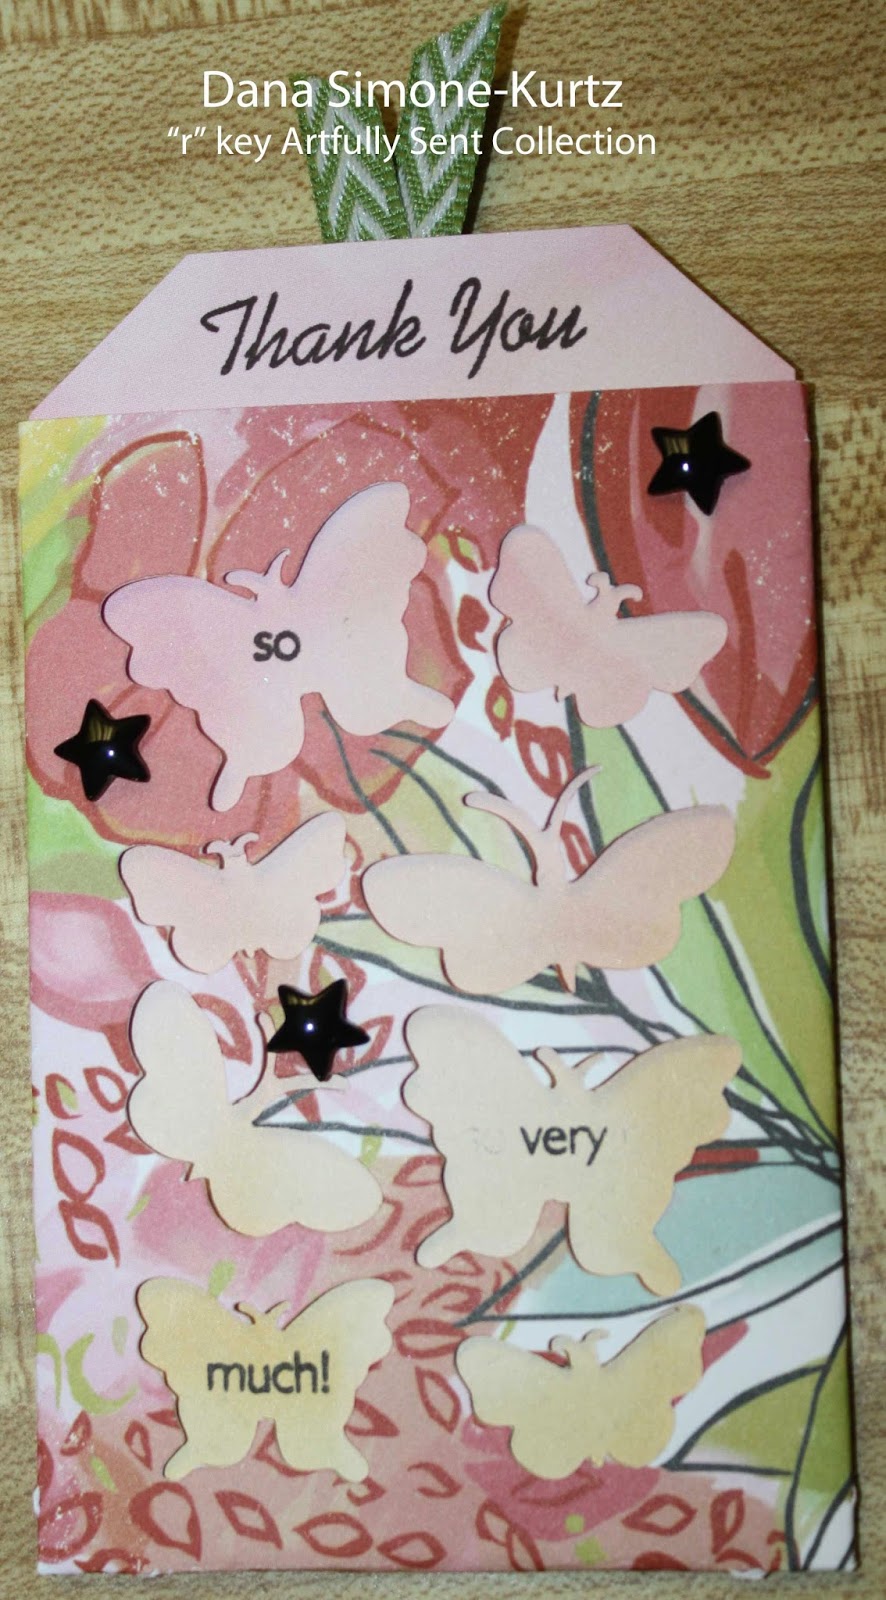
With the paper inside, I stamped the saying in the butterflies with black ink. I only inked the word I wanted each time. In other words, "so very much" was one stamp. First I inked the "so" and stamped it. I then cleaned the stamp. Second, I inked "very" in the corner of the pad. I wiped away any stray ink before stamping. I cleaned the stamp again. Finally, I inked "much!" and stamped that.
I finished the card off with black resin stars from Scaredy Cat Assortment (Z3011) and Topiary Mini Chevron Ribbon (Z1929).
My second card is almost the same as the above card, but with different colors. What else is different? I'll give you a hint... I used the Cricut Craft Room to edit it.

After selecting an image in the Craft Room, you can chose to "show contours" which will reveal the lines within the card. In this case, the butterflies. Click the lines you'd like to remove, click on "exit", and you'll have a modified image. : )
Slate cardstock was paired with Wanderful B&T paper (X7191B). The blue dotted paper is on the reverse side. I cut a smaller piece to cover the opening of that butterfly and adhered it to the back side of the front of the card. Then I cut a large piece - one to cover the whole backside - and adhered it. I put glue around the butterflies so the paper would be seated nicely. When you open the card, the blue dotted paper is on that whole side.
"Congratulations" is heat embossed with Gold Embossing Powder (Z2066). I thought about doing it in Silver, but because of the washi tape (Z1932) being silver, I wanted contrast.
Sponging in Slate and adding Gold Sequins (Z2012) finished off this card.
1 comment:
The Congratulations card is very appealing. I like the subtle contrast of the black butterflies and one light blue one.
Post a Comment