In Design Space, chose the poinsettia. All 4 pieces come into the work surface grouped, so you just need to resize the group instead of each piece separately. These images also come stacked. I sized the group to be 2.11" wide (height was locked to width). Why the extra 0.11"? I wanted to create the same size as last year's Artiste wreath and I thought this was the correct size. As it turns out, this wreath is larger than last year's. That's okay though, because I like it!
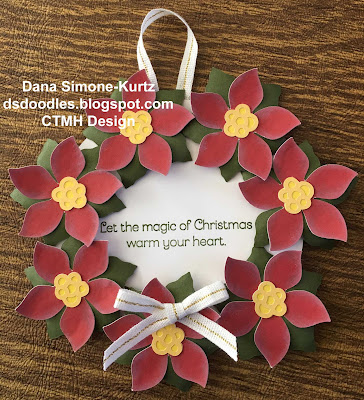
I sponged around the Cranberry petals with White Daisy Pigment ink. I put those aside to dry. You can always speed dry them with the Craft Heater. While they were drying, I glued the center Lemon on top of the Canary background for the centers. I also went and curled the New England Ivy leaves downward. I did this with a large balled stylus. When the petals were dried, I glued them onto each leaf and the center was added on top of each petal.
A 4" circle was cut from White Daisy cardstock. The poinsettia flowers were added to the edge with Thin Foam Tape. I realized afterward that I should have cut a ring of New England Ivy to adhere the flowers to so the white behind them wouldn't show. Too bad. The saying was stamped in New England Ivy and is from the October Stamp of the Month, but any nice saying would work.
Finally, the hanging ribbon and bow were from the White and Gold ribbon. I cut a second 4" circle and sandwiched the hanging ribbon between the two for a finished look.
That's it for this one!! I've been enjoying the Flower Market Collection. I'll be posting more samples from it (my Holiday Workshop has several items that used cuts from there) soon.
No comments:
Post a Comment