Showing posts with label Poway Adult School. Show all posts

Friday, April 5, 2019

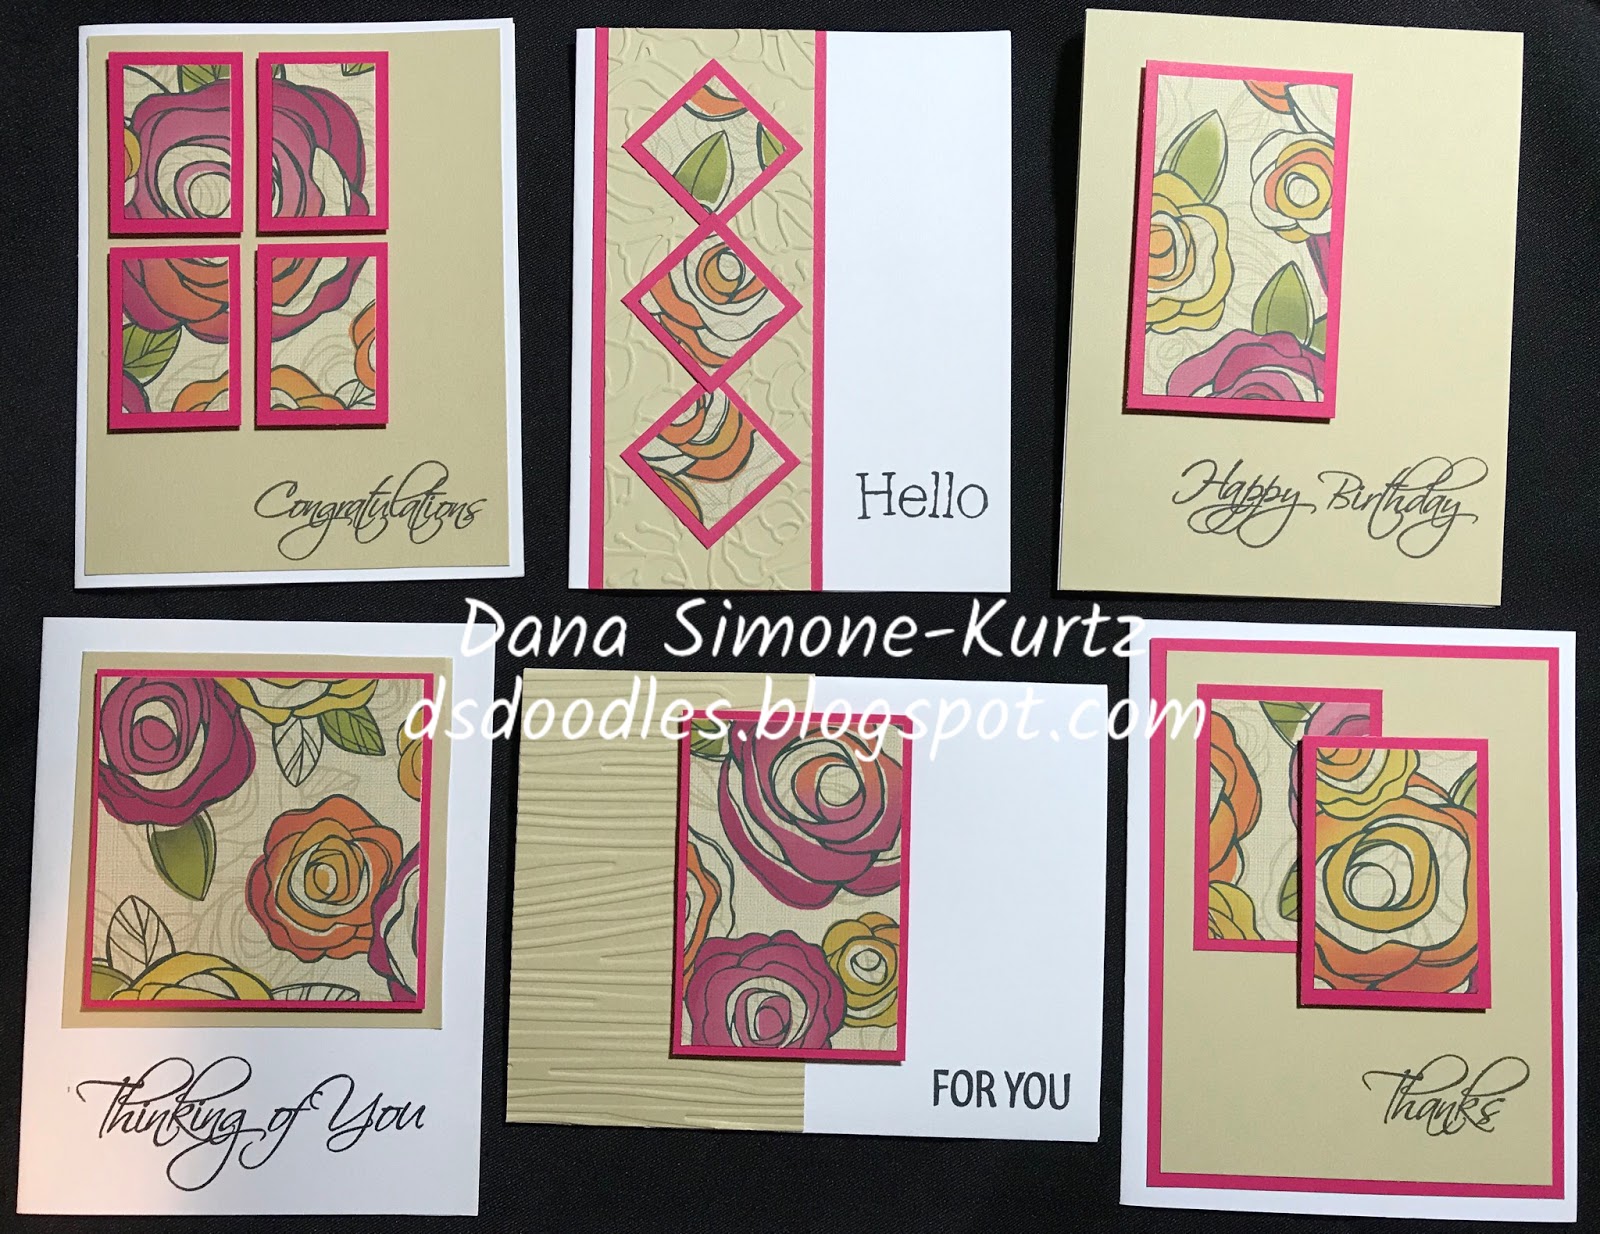
Second Spring Poway Adult Class - "Thinking of You"

My second class of the spring quarter is a box set.  "Thinking of you" is what is stamped on the box.  We'll be making 4 cards that you'll be able to put into the box.

So come join me on Thursday May 23rd from 6:30 - 8:30 pm to make the set!

This class will be held at Abraxas High School in Poway (south of Target).  Here's the link to sign up!

Hope to see you there!

Tuesday, April 2, 2019

Class at Poway Adult School - One Sheet Wonder

I really like it when my class submissions get selected.  : )  Step one complete.

Step two: People to sign up to take the classes.

This first class will be offered on Tuesday May 7th from 6:30 to 8:30 pm.  In class, we will be cutting the 6" x 6" background texture paper and then assembling the 6 cards you'll make in class.  You'll go home with knowledge to make more at home!


The class is at Abraxas High School in Poway.  Here is the link to sign up!


Tuesday, October 9, 2018

Let it Snow

Today I thought I'd share a home decor item that I've proposed to teach at the Poway Adult School in January.  I'm waiting to hear back if they'd like to offer it to the public.

 This has to be big so you can see the glitter paper on the "o".

"Let it" has been cut on the Cricut after being designed and welded on the computer.  The "s" also received a sponging of White Daisy Ink (Z2863) around the letter.

"N" is sporting paper from JoAnn's store.  I really wish we had something like this - it's super fun and fits the project so well!


Like I mentioned already, the "O" is from our White Glitter Paper (Z3237).  I love the sparkle.

"W" has been stamped with Pansy ink (Z2804) on JoAnn paper (clearly I was shopping when I picked the papers out.  I blame the snowflake paper).  The snowflakes are Falling Flakes A1223.


 Let me back up a little bit.
After I chose my colors, I traced each letter on the appropriate paper, making sure the front of the letter kissed the back of the paper.  The line around the letter was as close to the letter as possible.

Next I cut each of the letters out, staying on the drawn line.  If you are going to stamp, now is the time to do it.  I actually stamped the snowflakes before I cut out the "W".

I applied mog pog to the letters (rather than the paper) one at a time.  Then I placed the cut out paper on top of the mog pog.  The mog pog allows you a little bit of time before setting in order to place the letter where it needs to go.

After the letter dries, you can use a craft knife to cut excess paper away.  Although if you traced your letter close to the letter, you shouldn't have to cut.  You can also use sand paper (from the front to the back) to remove excess paper.

After making each letter pretty, I sponged the "S".

"Let" and "it" were welded and cut.  I used my non -stick micro-tip scissors (Z1836) to cut very thin pieces (and small) of thin 3D foam tape (Z2060) to prop up the letters.

This home decor will be going up in my home in January.  It should take a little sting from the empty mantel after my moose/deer collection gets put away.


The answer was, "we're going to pass ... for Winter [quarter]".  Oh, well, I still had fun making and sharing it with you!  : )

Wednesday, February 8, 2017

Random Technique Card-Making Class

Something must have been in my eye when I reviewed the title for this class.  Either that, or the Poway Adult School changed the name on me.  I'm not sure what happened to the word "Stamping" between "Random" and "Technique".  As a matter of fact, I'm not sure why "technique" is there.  The words must have subbed without telling me...

ANYWAY, I'm teaching a Random Stamping Class on March 20, 2017 through the Poway Adult School.  It's a Monday evening.  Maybe you want to come.

We will work from stamping to cutting to assembling the papers into cards.  When completed, they could look like this:
I'm also working on a black and white - color me - version.

These 10 cards are made from one 8.5" x 11" piece of cardstock.  In addition, a 12" x 12" background paper, an 8.5" x 11" cardstock, and some extra neutral cardstock (for the focal points and cut flowers) go into the making of the cards.  The card bases are not included in the papers.

I actually randomly stamped a 12" x 12" piece of cardstock.  I haven't done anything with the extra 3.5" x 12" nor the 1" x 8.5" of scrap I cut off.  And we won't do anything with it in class.  It will be difficult enough to get everything else done in the 3 hours we have.

I'll have close ups and more directions in the future.

Colors are Sky, Lilac Mist, Citrus Leaf, and Lemon.  Sayings are stamped in Black.